
line of RVs sitting in a parking lot in snow

How to winterize your RV

Updated June 8, 2026 . AmFam Team

When the last campfire fades and temperatures start to dip, it’s time to get your RV settled in for the offseason. Winterizing your recreational vehicle protects it from cold-weather damage and makes spring start-up a lot easier, too!

If you’re comfortable tackling a few DIY steps, you may save on service fees, and you’ll have a good idea of how to de-winterize when it’s time to hit the road again.

Whether you’ve got a motorhome, travel trailer, or fifth wheel, use this checklist to ready your rig for its winter hibernation.

What does it mean to winterize an RV?

Winterizing is the process of preparing your RV for freezing temperatures and long periods of storage. The main goal is to keep water from freezing inside your plumbing system, where it can expand and crack lines, fittings, and tanks.

In most cases, winterizing includes:

  • Draining and flushing water from tanks and lines
  • Bypassing the water heater
  • Adding non-toxic RV/marine antifreeze to protect plumbing components
  • Taking steps to prevent pests, moisture buildup, and battery drain during storage
Coverage that travels with you
Stay protected on every adventure with RV insurance from American Family Insurance. Our customizable coverage helps you prepare for the road ahead.

How much does it cost to winterize an RV?

On average, it costs $130 to $170 for a basic winterizing package at an RV dealer, depending on the size and class of your RV. If you pay a similar amount to de-winterize in the spring, those costs can add up over the years, which is why many RV owners choose to do it themselves.

RV winterization tips: what you’ll need

Before you begin, check your owner’s manual. Some RVs are equipped with built-in winterizing valves or controls, so your model’s requirements may vary.

Commonly needed supplies, which you can get online or from your RV dealer, include:

  • Nontoxic RV/marine antifreeze (propylene glycol)—often two to three gallons
  • Tubing for the black water holding tank and a cleaning wand
  • A water pump converter kit or hosing that connects to the pump inlet or an external hand pump
  • A water heater bypass kit
  • Hand tools to install and remove drain plugs
  • Ant and roach traps
  • Anti-rodent foam and peppermint granules or packets
  • Moisture-absorbing dry packs

Step 1: Flush your RV’s plumbing system

Follow these steps to remove water from the system:

  • Remove any water line filters.
  • Drain and flush all freshwater tanks, systems, and lines.
  • Drain, flush, and clean the gray and black holding tanks at an RV-approved dump station.
  • Turn off the water pump.
  • Let water cool, then drain the water heater tank by opening the pressure relief valve.
  • Turn all sink, shower, and outside faucets to the open position.
  • Flush the toilet.
  • Open the hot and cold low-point water drains by removing the plugs.
  • Turn on the water pump briefly to help push remaining water out—then turn it off right away to avoid pump damage.
RV camped next to a lake

Step 2: Add antifreeze to water lines

If your manufacturer recommends it, add antifreeze designed specifically for RVs and campers. Never use automotive antifreeze. Many newer RVs include a water heater bypass kit, which helps prevent wasting gallons of antifreeze to fill the water heater tank. If you don’t have one, ask your RV dealer about installing it.

To get antifreeze into the water lines:

  • Close all open faucets and water valves.
  • Bypass the water heater.
  • Install the water pump converter kit, or connect to the pump inlet, so the system can pull in the antifreeze.
  • Turn on the water pump to circulate the antifreeze.
  • Starting with the fixture closest to the water pump, slowly open each faucet/valve until antifreeze begins to flow, then close it.
  • Repeat for each fixture, working from closest to farthest from the water pump, both inside and out.
  • Replace the antifreeze container feeding the converter kit with a full one as needed.
  • Don’t forget washing machines, ice makers, and other appliances if your RV has them.
  • Flush the toilet until antifreeze flows.
  • Pour about a cup of antifreeze down each drain to protect P-traps.
  • Pour the rest of your antifreeze into the freshwater tank.
  • Turn off your water heater’s heating element.
  • Double-check that all faucets are closed.

Step 3: Keep pests from moving in

Rodents and insects can squeeze into surprisingly small openings in your RV, and storage season gives them time to get comfortable. A little prevention now can save you a lot of cleanup later.

To help keep pests out of your RV:

  • Remove all food, including pantry items.
  • Seal cracks and crevices inside and out with anti-rodent foam.
  • Place peppermint granules or packets in storage areas and nearby entry points.
  • Set ant and roach traps around the interior.
A couple cuddling in the back of their parked RV.

Step 4: Prepare the engine, batteries, and electrical system

If you’re storing a motorhome, take time to protect the drivetrain and power systems:

  • Top off engine oil, brake fluid, transmission fluid, and winter-rated windshield fluid as needed.
  • Add fuel stabilizer, fill the tank, and run the engine for about five minutes.
  • Check battery fluid levels, if applicable, per the manufacturer’s instructions.
  • Fully charge all batteries.
  • In freezing climates, disconnect and store batteries safely in a warm, dry location, or disconnect at the terminals—negative side first—for warmer climates.
  • Turn off the main breaker and disconnect from shore power.
  • Remove batteries from small devices, like clocks, remotes, sensors, and detectors.
  • Remove electronics, such as TVs, tablets, and laptops.
  • Follow the manufacturer’s storage instructions for onboard generators.
Steel wool may help keep critters out
Some RV owners stuff steel wool or aluminum foil into openings to discourage pests. If you do, tie a note to the steering wheel so you remember to remove it before your first spring trip.

Step 5: Protect your tires during storage

Your owner’s manual should be your first stop for off-season tire care, but these best practices can help:

  • Park on concrete if possible.
  • Set the parking brake and wheel chocks.
  • Use leveling jacks (not stabilizing jacks) to reduce the risk of flat spots.
  • Consider external jacks to lift the RV if recommended and safe for your setup.
  • If you don’t lift it, move the RV about a half-tire rotation a few times during the offseason.
  • Lower the stabilizing jacks enough to keep the RV steady while you’re inside it, but it shouldn’t be taking on any load.
  • Spray the RV with UV-protecting conditioner.
  • Cover tires and protect them from UV exposure.

Step 6: Manage propane tanks and fittings

Temperature swings can cause expansion and contraction in propane systems which may lead to leaks and problems next year. Before storage:

  • Refill propane tanks.
  • In freezing climates, remove external propane tanks and safely store them in a warm, protected place—not inside the RV.
  • Cover propane fittings with plastic bags secured with rubber bands.
  • Replace any hoses or fittings that show cracking or wear.

Step 7: Clean now to make spring easier

A quick, closing-day clean helps prevent odors, mold, and mildew. It will also put you back on the road faster when RV season starts back up again.
  • Unplug, clean, and dry the refrigerator. Leave the door open during storage, according to manufacturer guidance.
  • Remove toiletries, medicines, and any remaining food items.
  • Vacuum floors and carpets.
  • Wipe down all surfaces.
  • Remove and launder all bedding, towels, and clothing.
  • Place moisture-absorbing dry packs throughout the RV.
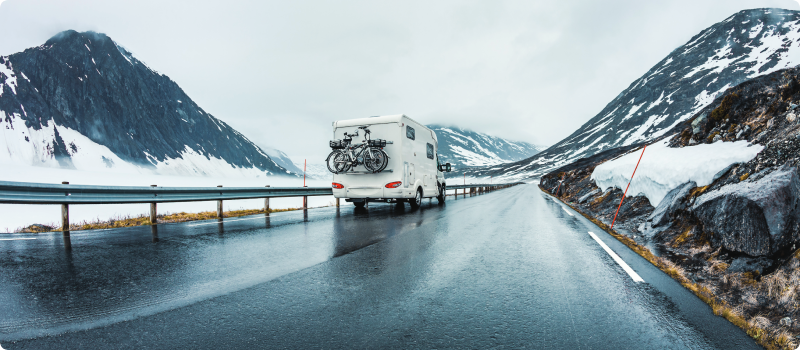
RV traveling through mountain area during winter weather

Step 8: Protect the exterior, roof, and awning

Winter weather can be rough on seals, roofs, and fabric. To help protect your RV:

  • Store under a shelter when possible.
  • Use a breathable RV cover, rather than a non-breathable tarp.
  • If needed, place a waterproof barrier on the surface where the RV will rest.
  • Fully extend and wash the awning according to the manufacturer’s directions, then let it dry completely before rolling it back up.
  • Consider an awning cover to protect it from the elements during storage.
  • Close roof vents and block other vents open to the air. Many owners use steel wool or aluminum.
  • Seal small exterior cracks with silicone caulk where appropriate.
  • Cover the AC unit if recommended for your model.
  • Clean and store the sewer hose.

Ready for spring—and whatever comes with it

Winterizing may feel like a long checklist, but it can add years of enjoyment to your RV or camper. Before you know it, it’ll be time for another season of adventures, and you’ll be ready!

As you’re giving your RV some TLC this fall, remember to check in with your American Family Insurance agent to review your RV coverage options. With a solid winterization strategy and well-built policy, your RV can be protected from the elements and the unexpected, so you’re road ready well into the future.

This article is for informational purposes only and includes information widely available through different sources. This article does not afford, offer, or guarantee any coverage.

This information represents only a brief description of coverages, is not part of your policy, and is not a promise or guarantee of coverage. If there is any conflict between this information and your policy, the provisions of the policy will prevail. Insurance policy terms and conditions may apply. Exclusions may apply to policies, endorsements, or riders. Coverage may vary by state and may be subject to change. Some products are not available in every state. Please read your policy and contact your agent for assistance.

Tools & resources

Explore our tools and smart tips.